Just a quick update on my UNFOLLOW ME post where I detailed exactly what kind of an idiot I am. The truth is, I’m still every bit the same idiot I was before and you should absolutely take any thing I say with a grain of salt.
That said, let’s attack the three things I did to get here in the first place.
THE JACKET
Let’s start with my jacket. I had rather stupidly folded it in half and then put it in the beaver tail of my Mosko Moto Reckless 80s for a ride home. Trusting the holding capability of my Mosko Moto Rackless 80 was a stupid thing to do with a brand new jacket but here we are. It slipped out – on the freeway and by the time I was able to circle back and retrieve it – it was run over by who knows how many vehicles.
I had three wear holes in the back. They had gone through the outer fabric but not the inner.

Then there was damage along the bottom (still on the back), but more to the liner on the inside. This didn’t go to the outer layer of fabric but still needed to be addressed.

To fix it, my general plan was to use high strength tape – instead of going the sewn on patch way. When Mosko had sent my bags back, after saying that they couldn’t fix them, they had included two of these heavy duty NoSo patches, presumably to fix a small scrape I had? I don’t care diddly about a scrape in the side of the bags so these went unused.
They have a heavy cordura on the outside and I figured that would work pretty good.
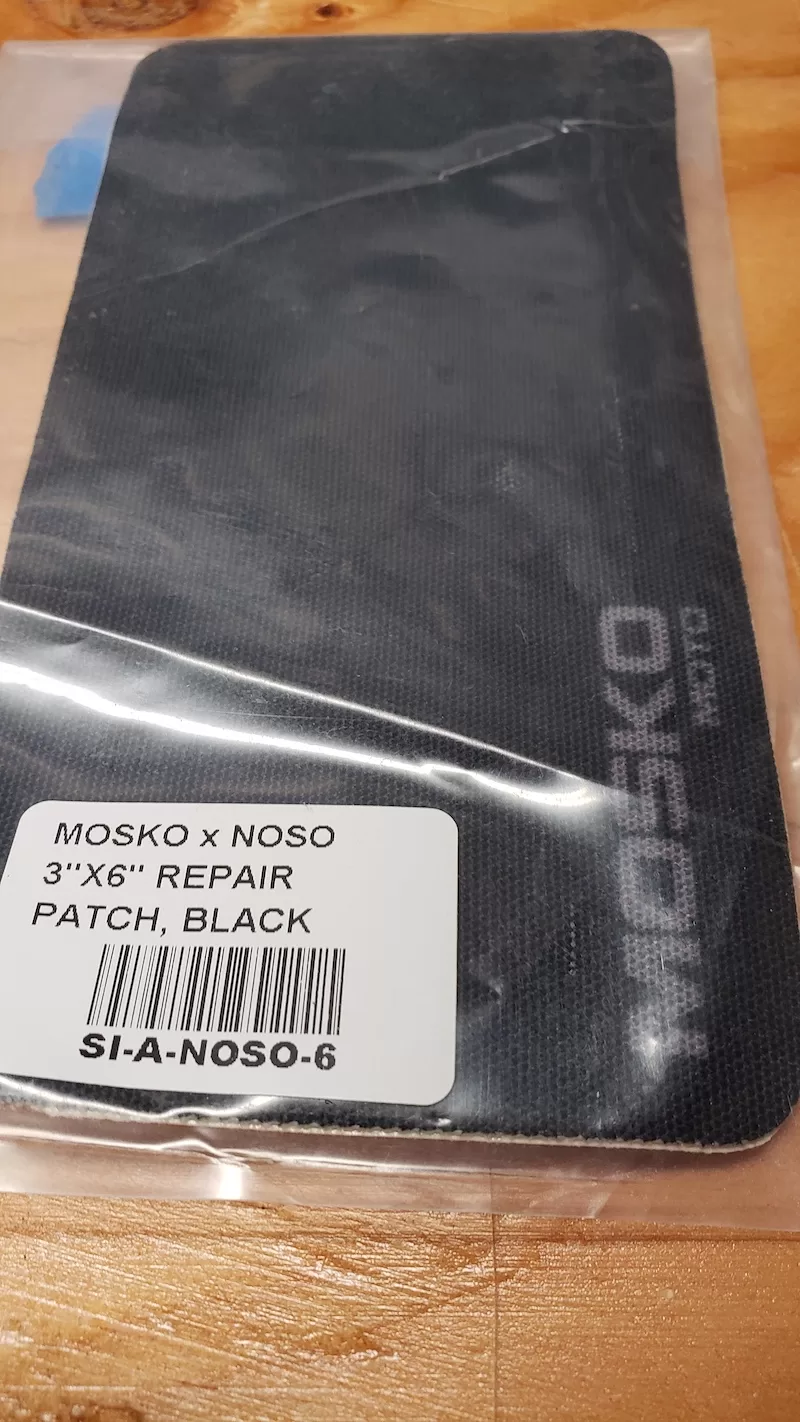
I went online and could not find anything bigger from Mosko or NoSo than this 3 x 6 inch patch. I did find Tenacious Tape in a roll. It was still 3″ across but I could get a longer strip. It wasn’t as heavy duty as the NoSo.

The general idea was to tape the inside of the outer holes with the Tenacious stuff so that the NoSo patches wouldn’t stick to the inner liner or back protector. With the help of the wife we (mostly she) got them patched from the inside! You can see the inner liner that needs to float in this picture.

And then this is it patched from the inside. The shiny part is the sticky glue side.

Next, we came back with the heavy duty NoSo style of patches which stuck really well to the outer layer of the jacket. 3 holes, but with two of them being smaller, I cut one of the 3 x6 in half and it worked fine!

Flipping the jacket over, we tackled the inside damage.
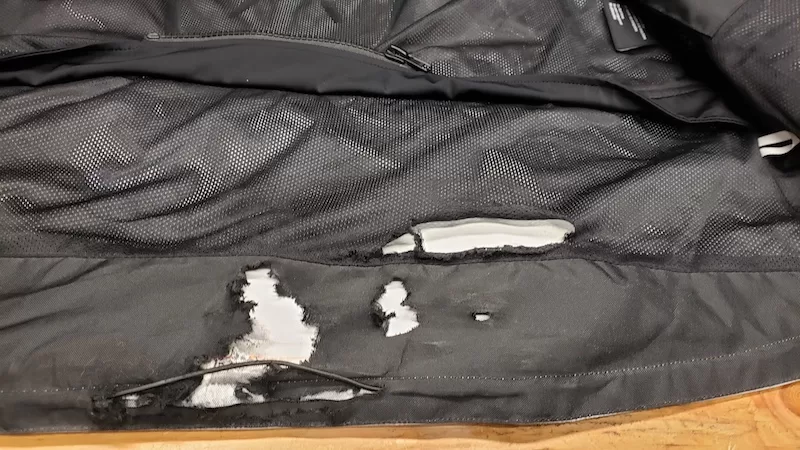
This would be all Tenacious Tape and we weren’t concerned with it adhering to the inner (outer) layer as it was all close enough to the sewn seams. The Tenacious Tape was perfect for this. It has a silky, more flexible layer that will work just fine. For the very bottom we actually folded it over to get a nice smooth leading edge to the bottom of the jacket.
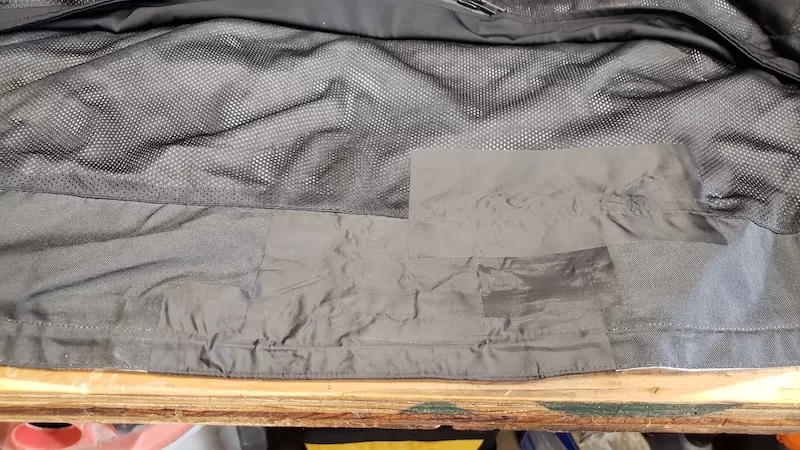
Hopefully, everything holds. None of the damage was in a high stress area – so that’s a win, right?
THE OIL LEAK
I know my oil leak was coming from the Gear Position Sensor. I had bought the correct o ring the last time – for less than a buck. Replaced it and called it a day – but then the oil leak returned.

How do I know it was the gear position sensor? I cleaned everything up – no oil, then warmed the bike and checked to see. This is looking from the ground up towards the counter shaft.

Tomm suggested an aviation gasket stuff that they use at the shop – so I swung by and picked it up.

Then I pulled off the case saver from Vanasche – Great stuff!
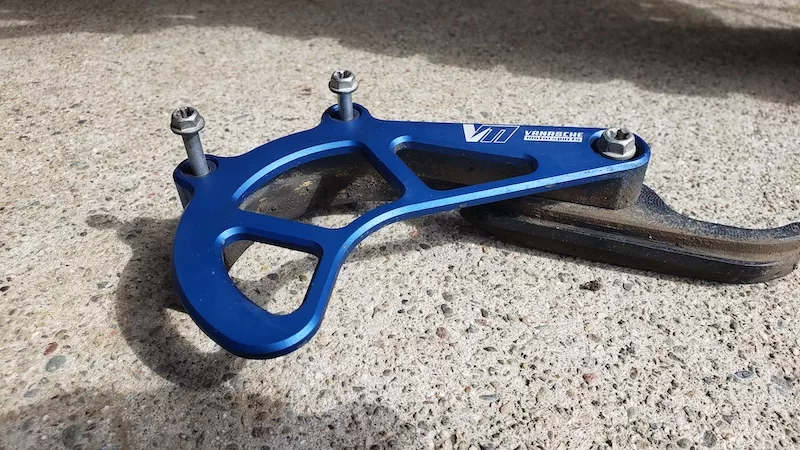
That gave me a little more working room to see what I had going on and maybe be a little smarter about this leak.

That white block is the Sensor. The leak looked like it was coming from the bottom of it. It’s just two allen bolts to remove and I didn’t even need to unplug it or loosen the wiring harness.

My o ring that I had replaced was looking good but obviously the oil was still getting out. I started cleaning the sensor off. You can see the crud but what I noticed more of was that the bolts went through reinforced brass or copper collets. There was a large amount of something stuck to the threads of both bolts. Maybe thread lock? Easy to clean no matter what.
Looking at the case, I noticed the remnants of maybe a gasket? There’s isn’t one on the parts diagram, just the o ring.

Maybe the previous owner had done exactly what I was going to do and use a form – a – gasket there. Maybe it was supposed to have that all along? The case area is machined flat so I can certainly see that working.

I cleaned both sides to new condition and applied a thin layer of the sticky stuff to both. It has a high viscosity. I used a toothpick and not this massive brush to get just enough on either side.
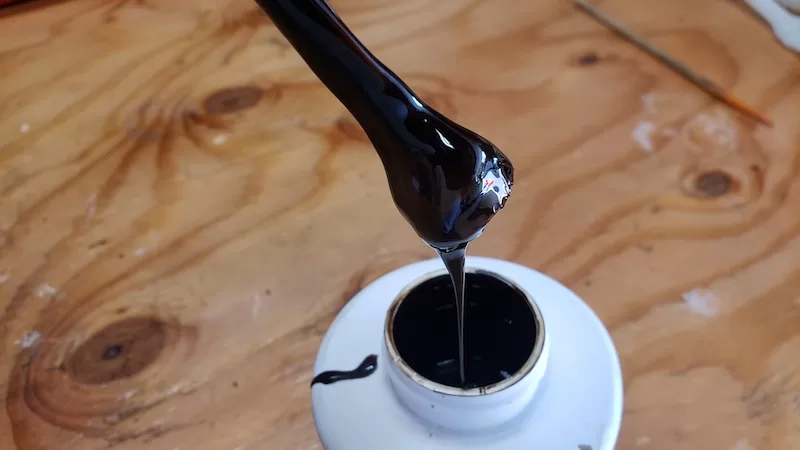
Tomm had mentioned to let both sides cure a little before sticking them together. I kept the gasket from the area where the o ring sat.

Next, I put it all together. It’s pretty easy, just the two bolts and making sure the sensor pin goes into the hole (at 2 o’clock) and torque it down.
I cleaned up the extra goo from the sides and just let it cure for a few hours. I then let the engine warm up – checked for leaks – none! I took it around the block, changing gears up and down then back home – still no leaks. I just checked again this morning and we’re still clean and dry – so maybe, just maybe…

THE TIRE ROTATION
Somehow I had managed to mount my front tire on backwards. I’m not sure how as if you are mounting the tire you find the marker on the sidewall, then do this silly motion with your arms simulating the rotation of the wheel as it would be moving forward. We all do it. You do it too. Once you are satisfied you have it correct you attack the tire with a tire iron and the rest is history.

Unless you get it wrong. Like I did. Then, as you are doing something to your bike (like looking for an oil leak you had already fixed) you glance at the tire sidewall and discover you are an idiot.
I put the bike up on a stand and then using only the tools I carry on the bike I set about to take the tire off, and mount it the correct way.
Tools needed / used were my:
- Motion Pro axle wrench that also double as a tire iron. This used to be zip tied and safety wired across my handlebars but now lives in my front fender bag – when I added the Navigation bracket.

- My Engduro Double Trak. This is part of my minimalist tool kit and really works well. It now lives in my tankbag for easy access is is usually the only thing I need. This is used for the fork pinch bolts.

And for levers I carry Motion Pro Bead Breakers. These are zipped and safety wired to the underside of my rear rack. They have broken every bead I’ve asked them to and they also work well as tire levers. They are short and strong and if you get a little practice with them you’ll not even need a 3rd or 4th lever. You can see my rear tube holder that I snuck under the rear fender.

Also for the record, I am not using the stainless steel side racks right now. It’s a little lighter and the Mosko Rackless 80 works just fine without them.
So I took off the wheel, put a towel down on the driveway and took off the tire – easy peasy. I had watched a Brett Tacks video the other day and he suggested to use WD-40 as tire lube. So I gave it a try and yes it worked just fine. I’ve used soap and water, special tire lubricant, and even Astroglide before (really!) and they all work fine. I can see an advantage with WD-40 if you can find a small enough can.
I flipped the tire around and then checked rotation again. Then I checked it again. Then I went inside, got another cup of coffee and checked again. Satisfied I wasn’t going to do it again I mounted the tire.
With the tire mounted I then balanced it, and then mounted the whole thing back on the bike. That’s when I saw the nail sticking out of the back tire. I wasn’t lucky enough for it to be in a big rubber block.

The tire was still holding air so I crossed my fingers, grabbed a set of pliers and pulled. It was only in the rubber maybe a quarter of an inch. It hadn’t gotten to the tube (yet). Yay Me!
In conclusion – follow me if you like. I may or may not make the same stupid mistakes again. Things are always going to go wrong – it’s just making the right corrections when they do. I have a month before LAB2V and so I’m going to go out this weekend and see if everything holds together.
- My 2006 KTM 950 is SOLD! - April 26, 2024
- The Bay Area Adventure Rally - April 16, 2024
- What to Pack on a BDR Trip - March 4, 2024