Having decided to do both the LAB2V and then the So Cal BDR I got to work prepping the bike. I put the bike up on the stand at 14,355 miles and started taking it apart.

It’s been a whirlwind of ordering and the waiting. Honestly, it’s been kind of like a jigsaw puzzle as some parts were back ordered and so I had to wait for this part before I could work on that part. I also have a serious case of “while you’re in there…“. We’ll just abbreviate that as WYIT, eh?
I have ordered a shit ton of parts the last few months.
It started with tires. I went with the Tusk D-Sports from RockyMountain again. The last pair lasted me a good number of miles. Can’t complain about that, right?

I had new tubes ready to go. I’m trying these super heavy 4 mm thick tubes for the rear and more of a standard 3 mil thick for the front. They are really heavy in weight as well as being thicker. A set of tires runs just $150 for the pair.
I started swapping tires using a borrowed Rabaconda and while it didn’t take the advertised 3 minutes, there certainly was a level of ease with it. I’ll say that the Rabaconda might work well for Mousse, and it did work really well for getting the tire off, putting it on was just about the same as with out the machine. It was nice to be working at waist level and not on the garage floor, but I still had to tire iron the tires on just about like normal.
WYIT #1: Hey, “while you’re in there”, I should replace the wheel bearings, right? It being a used bike I have no idea what the wheel bearings have been through. Wheel bearings are cheap, so they were ordered. I made sure I got the right sizes and the seals where applicable.
I also ordered a new chain, sprocket, and counter shaft sprocket. COVID delays are pretty much a thing of the past but I kept running into back orders and shipping delays. I ended up with a mismatched set of sprockets as the only thing I could get shipped in a timely manner. The orange anodized aluminum rear sprocket wasn’t something I really would have gone with but I couldn’t find the correct size in steel.

Aluminum is much lighter than steel but also wears much faster. The ones I really wanted have steel teeth but an aluminum center section – best of both worlds. Oh well.
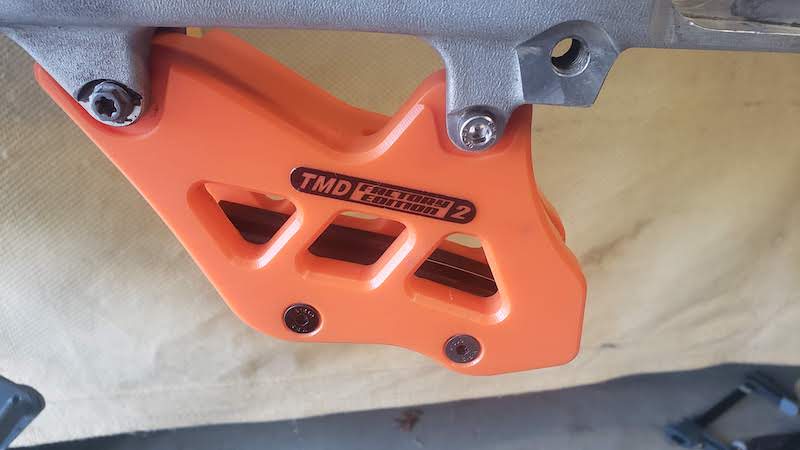
WYIT #2: Hey, “while you’re in there”, I should replace the chain guide. I know there’s a really solid one that everyone raves about. It’s from TM Designs. RockyMountain carries it but amazingly they would not sell me one. Their computer didn’t list the model as being applicable to my bike model. I ended up calling TMDesigns directly and they said the model indeed does fit so I ordered direct from them.

I should also mention that I had a question on spark plugs so I called RockyMountain and they suggested 2 of these iridium NGK. Easy enough, add that to my order! More on this later.
Wheel bearings are a little tough to remove sometimes. I ended up being able to knock some out with a punch and hammer and then there were a few that needed to be pulled. The bike shop had a expanding thingy that I could insert into the inside bearing race and tighten enough to be able to hit the tool with a punch and knock the bearing out that way.
Getting them back in, was generally easy too. Almost. I messed up the order of the rear and accidentally put a spacer where it didn’t belong and need to push the bearings out to fix it. That little #8 is supposed to go on this side, I had it on the other side. It’s a 3mm plastic spacer.

Long story short, Tomm, who has waaaaaaay more experience with bearings than I ever will, stepped in and suggested that I should not reuse the new bearings again. When you run a business called Electric Motor Service for 71 years I guess that qualifies as experience. (boy is he old!)
So, I took the wheel down to the shop and we pulled out the old, swapped the spacer to the right side and then ever so gently pressed yet another set of brand new bearings into the axle. I cannot adequately express just how gentle he was with bearings. Here I am sledge hammering them in with a large socket and he’s just about singing them lullabies and verbally coaxing them into place.
Honestly, he has a large hydraulic press in the back and using a large piece of pvc both bearings went in like butter.

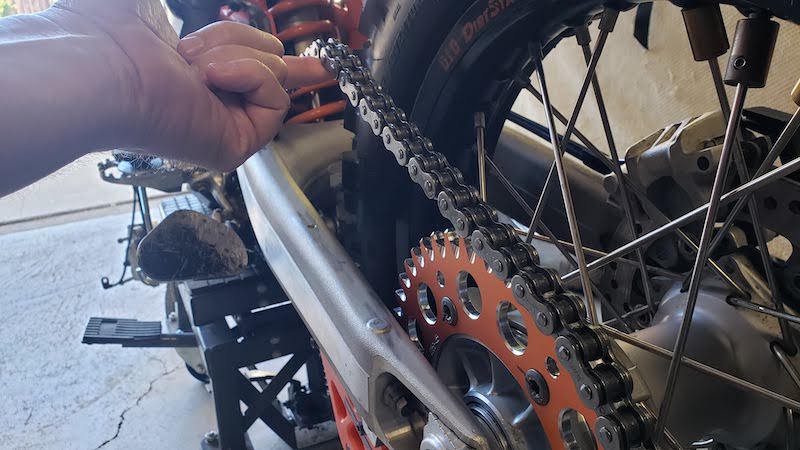
On the chain, I have stock gearing. I like the stock gearing too. That’s why I had a hard time finding the right rear sprocket. RockyMountain said my chain should be 118 links long. I believed them. Why would they lie?

But with the stock 15 tooth counter shaft and the stock 45 tooth rear, this is what a 118 chain looks like with the wheel adjusted all the way out.

KTMs run pretty slack chains but that’s way too slack. Putting the wheel all the way in on the adjusters this is how many links I needed to remove.

That’s better than having too little links, right? So I took out the angle grinder, ground the rivet and then pressed out the little bugger. I’ve got a master link (actually I also carry an extra) so that was an easy fix.
This was also the first time I’ve had a chance to use this cool little tool from MotionPro that clamps on the sprocket and has a straight rod pointing down the chain. You can easily see if you are aligned and if not, which way to adjust.

With the bearings in, tires on, chain, sprocket and chain guide installed it was on to the next part.
Oh yeah, I forgot to mention I also ordered new plastics but that was a little nightmare as nobody had them all, I had to order from different places and hope they were all the same. They were but I’ll show that later.
- The Bay Area Adventure Rally - April 16, 2024
- What to Pack on a BDR Trip - March 4, 2024
- I’m selling my 2006 KTM 950 Adventure! - February 16, 2024